For workers who manage files and folders every day, knowing how to know file paths in macOS Sonoma is like a treasure. It can save time and make the task very easy. In this article, we are going to tell you how to do that.
Using file paths and copying their address is essential to more professionals like developers and programmers. Because they have to do things with these file paths and command prompts, also when it comes to the design field, they like to share the file locations with their team because using real files helps to get a good output. Not even in this career field, for academic purposes using file paths may be required in some cases.
On the Mac, users can set up the Finder app to get the file or folder direct path. You can use two methods to do this work.
Get File Path Automatically
For this you have to get a free app. it is called Actions app. With this app, you can get automation including making files and lists, etc.
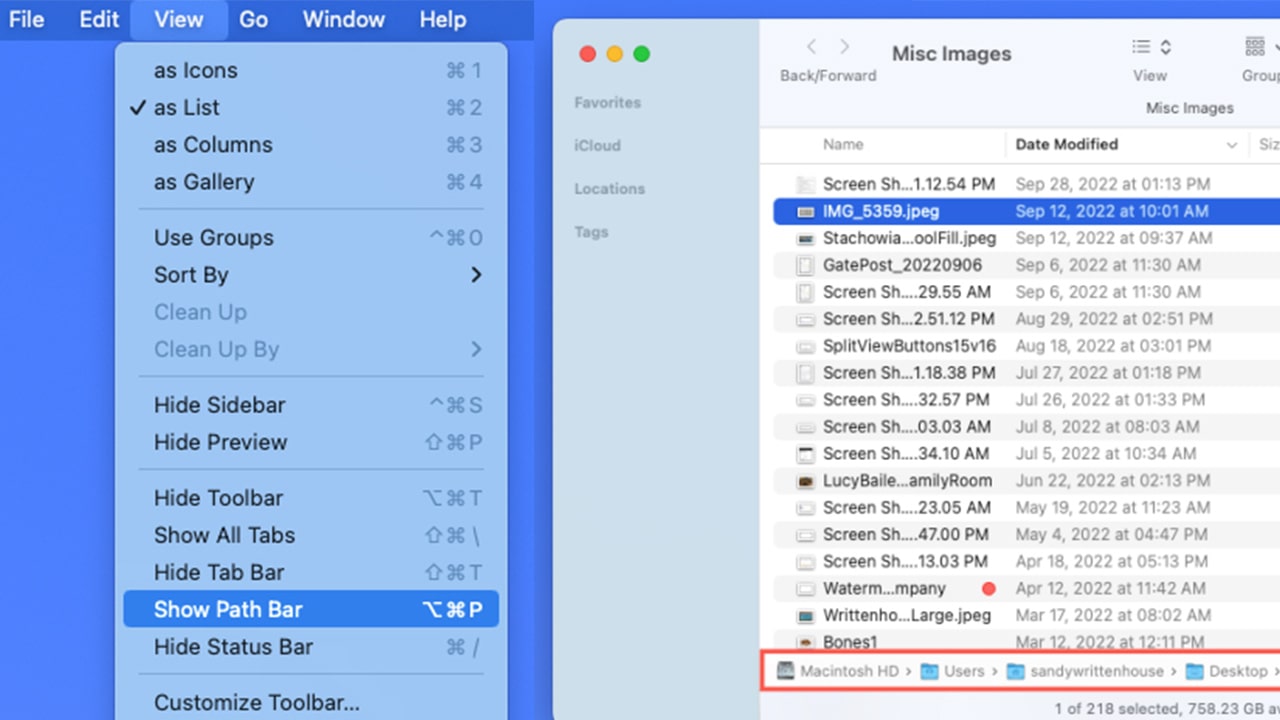
- View paths without copying
- For this, you have to navigate to the finder.
- Open it and go to the file you want.
- You can see the finder menu and tap on ‘view’.
- Then select the show path bar icon.
- After enabling this users can see file paths about every finder window when they open them. Users can see their file paths without copying.
Copy a File Path
- Open the Finder app on your Mac
- Then go to the file you want the address
- Right-click on the file icon and you can see more options in there.
- Then click on the option button. It shows more new choices.
- In there, select the Copy [filename] as Pathname. It will copy the file path of the desired file.
After the copy, you can easily paste them in wherever you need.