Apple users already have iCloud for backup of all their valuable photos. But what happens if someone accidentally deletes or some kind of corruption occurs? Then those photos will vanish from everywhere.
macOS Sequoia can do the local backup part to save your valuable photos. In this backup process, first download all originals from iCloud to the Mac and then do the local backup. In this article, we are going to dig into the process of local backup.
Select the Correct Photo Library on Your Mac
First, users have to do a proper sync between their iCloud and Mac’s photo app. To do that, designating the correct system photo library is important. If it is not, users face a common error. This error prevents the iCloud photo from syncing to the Mac.
The common case for this error is that most of the time, users mainly use iPhones or iPads for photo management and don’t pay much attention to the Mac’s library settings. So, the Mac’s photo app is not linked to the iCloud photo library and gives these errors. To fix that,
- First, close the Photos app. Hold down the Option key.
- Open the Photos app again after it.
- You can see the Choose Library window on the screen, from there choose the one you want.
- When it opens, navigate to the menu and choose Settings.
- In the general tab, choose “Use as System Photo Library”. This option becomes greyed out when it is chosen.
- After doing this, check your iCloud tab in the Photos settings and ensure that “iCloud Photos” is checked.
Download Originals to Your Mac
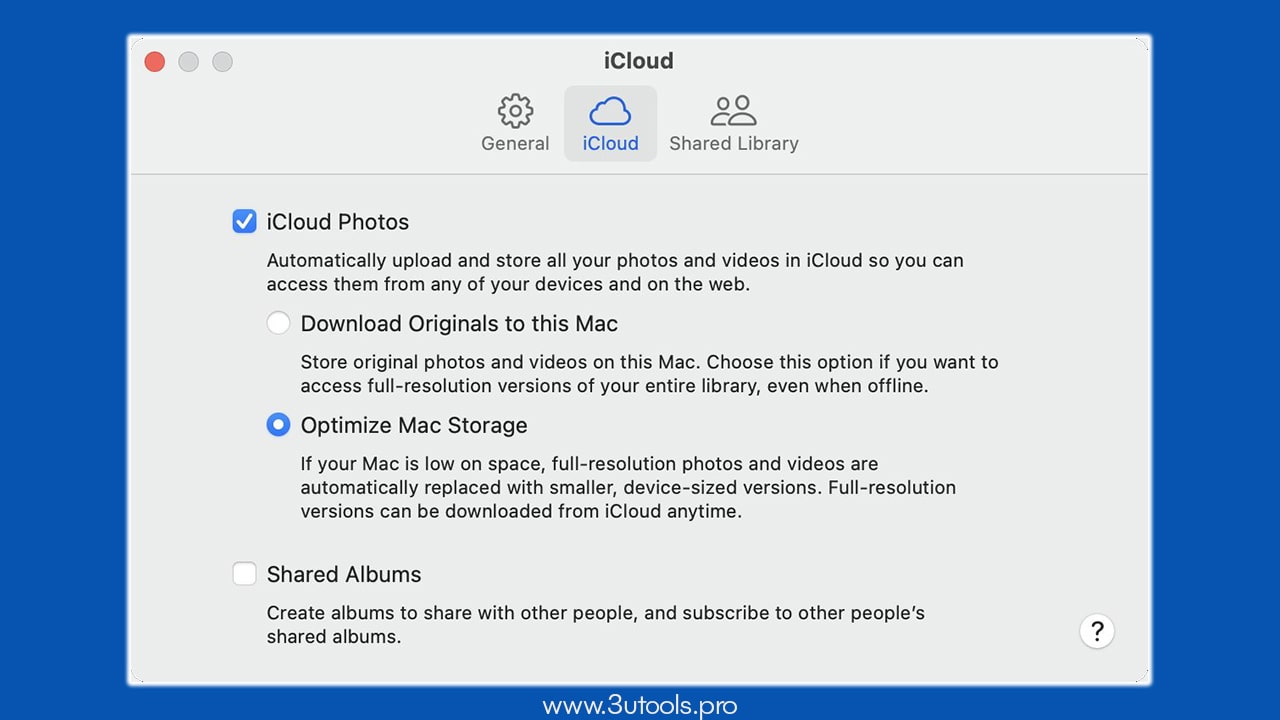
After sync, the Photos app is the one that manages photos on your Mac. iCloud is responsible for keeping the Photos app up to date across all sync devices. Until you download the original photos from iCloud, you can only see lower-quality previews in the Photos app. To download,
First, open the Photos app and then navigate to the settings. In there, choose the iCloud tab and enable the Download originals to this Mac option.
After doing this, the Optimize Mac Storage setting will be disabled and start download of your iCloud photo library. This can be large local storage, depending on your choice of selection. If you don’t have enough storage for all your photos, you can add an external drive or connect an external one and make it your system’s photo library. Then the photos will be downloaded to that drive. Until the process finishes, keep your Mac online and plugged in. If it sets to sleep when the screen is off, prevent it by changing features in your System Settings, Battery section.
Back Up to an External Drive Manually
After all the photo originals are downloaded, you can start the external backup process. To that,
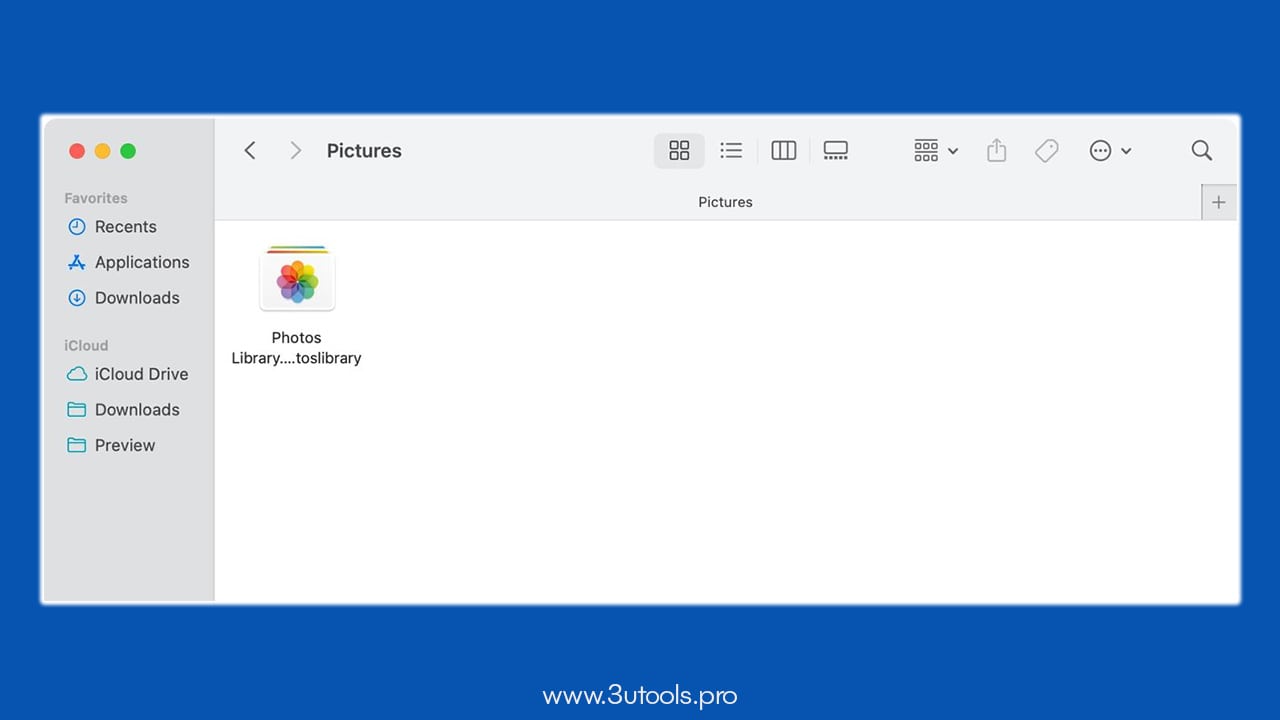
- First, quit the Photos app completely.
- Then open the Finder and choose your Pictures folder.
- Then, locate Photos Library.photoslibrary.
- Next, connect an external drive formatted. Connect this as APFS or Mac OS Extended.
- After that, drag your Photos Library file onto the external drive. Then the coping process will start.
Also, you can copy them manually to an external drive. For that, first quit the Photos app and then drag the Photos Library.photoslibrary file from the Pictures folder to the external disk.
Remember, when you’re doing this transfer process, don’t remove the drive or let Mac sleep. These things can lead to the corruption of your backup. After the process finishes, you have a complete backup of all your photos and videos, and also the Metadata.
When you use a drive as a backup, don’t use the one already used for Time Machine. Apple warned about using a drive that is already used for Time Machine for backup. Also, in case of using the drive to open the Photos Library directly, you have to adjust some of the driver permissions for that. To do that,
- First, navigate to the external drive and right-click on Finder. Then choose Get Info.
- Check the box next to the “Ignore ownership on this volume” option. You can find it bottom of the window.
When you check it allows you to access your Photos through the drive without causing any unnecessary errors.
Backup to Another Location on the Same Mac
If you don’t have any external drive for backup and you still want to do the local backup, this method is for you. But this is not a recommended method. This one doesn’t give full protection if a drive failure happens. But it can help you if there is any user error, software corruption or a mistake in deletion. To do that, first, you have to create a partition or a second volume for the backup using Disk Utility.
- Navigate to Applications, then Utilities Folder. Open the Disk Utility.
- In the sidebar, choose your internal disk.
- If you want a new APFS volume, click on the Plus mark, and if you want an HFS+ partition, click on the Partition tab.
- Add a name for the new volume and choose the format type. After that, click on Add.
This is a good and protective way because adding a new volume on an APFS disk doesn’t erase your existing data. After the new volume appears on the Finder, close the Photos app and copy the Photos Library.photolibrary to the new volume.
Use Time Machine for Additional Safety

The time machine can work as an additional safeguard for your photos by making regular backups automatically as long as the library is stored in the Mac’s internal drive.
- First sure that your Photos library is located on your internal disk. Plug a backup drive compatible with Time Machine and turn it on in System Settings.
- You can start backup manually, or it will backup automatically.
- Also, you can use this to restore deleted or changed photos later.
To work correctly, make sure Mac’s internal storage has your Photos library. If a file is changed in the Photos app, it will automatically be updated on all the sync devices. That’s why having a local backup is essential. The recommended way is to use a local and time machine backup in parallel.